


Are you ready to bring warmth to your home with the Schluter-DITRA-HEAT system? This comprehensive step-by-step guide will walk you through the entire installation of your new heated floors, ensuring a cozy and comfortable living space.
Step 1: Planning
Selecting Membrane and Cables
Before starting, use the DITA-HEAT Estimator to access your cable length. Measure accurately when choosing DITRA-HEAT heating cables, keeping in mind minimum spacing from walls, cabinets, heat sources, and other fixed elements. Make sure you select the appropriate heat membrane for your specific home and floor type.
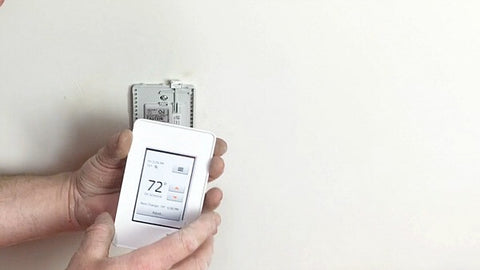
Buffer Zone and Thermostat Placement
Plan a buffer zone where excess heating cable can be placed, and floor warming is not essential. Consider the thermostat location, ensuring it accommodates the total current of connected heating cables. Alignment of studs on the membrane makes subsequent cable installation more straightforward.
Step 2: Preparation
Substrate Preparation
Your substrate must be clean, even, and load-bearing. For wood substrates, address tightly butted seams and tented plywood or OSB seams before proceeding. Verify that panels are correctly fastened. For vinyl substrates, ensure a sound structure beneath and that the vinyl is well-adhered. For concrete, remove any waxy or oily films, and if the concrete is particularly dry, moisten it before bonding the membrane.
Additional Considerations
For gypsum substrates, check that residual moisture in gypsum screed is 2.0% or less. Follow the gypsum manufacturer’s directions for additional substrate preparation.
Step 3: Installing the DITRA-HEAT Membrane
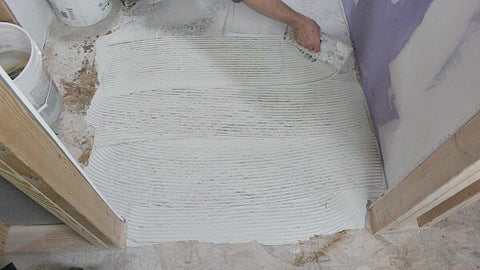
Thin-Set Mortar Application
- Use a thin-set mortar suitable for your substrate.
- Apply the mortar with a 1/4" x 1/4" square-notched trowel.
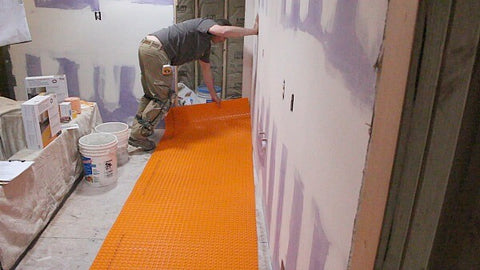
DITRA-HEAT Membrane Installation
- Lay the chosen membrane with the fleece side down.
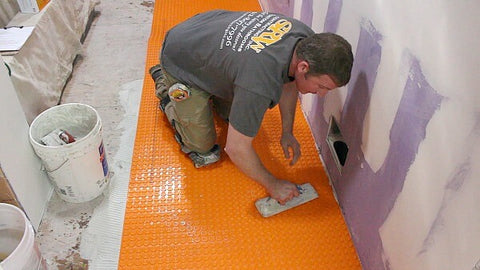
- Embed the matting solidly into the mortar using a float, screed trowel, or DITRA-ROLLER.
- Ensure full contact between the fleece webbing and the thin-set mortar.
- Abut end and side sections of adjacent sheets, aligning studs for easy cable installation.
DITRA-ROLLER Use
- Place a weight on the DITRA-ROLLER shelf (not exceeding 75 lbs).
- Slowly move the roller from one end of the matting to the other, slightly overlapping successive passes.
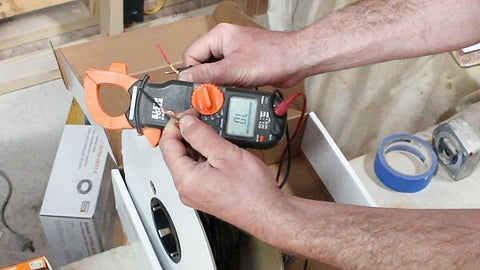
Step 4: DITRA-HEAT Cable Testing
Test 1: Conductor Resistance
- Measure resistance between the two power leads.
- Record values in the heating cable tests log.
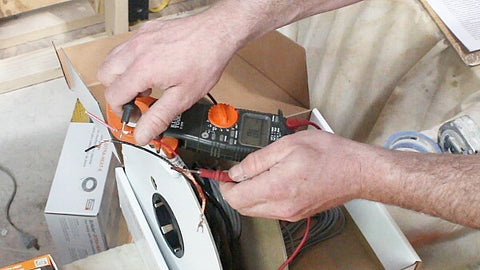
Test 2: Conductor and Ground Braid Continuity
- Use the continuity test function to check for contact between the braid and power leads.
- Record results in the heating cable tests log.
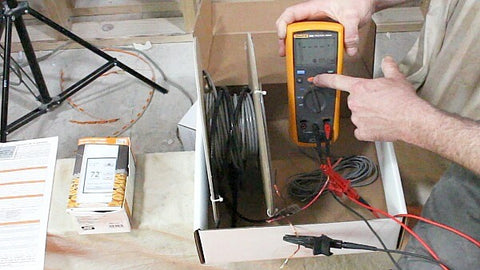
Test 3: Insulation Resistance (Recommended)
- Use a megohmmeter to measure insulation resistance between the braid and one power lead.
- Ensure the measurement is equal to or greater than 1 Gigaohms.
- Record values in the heating cable tests log.
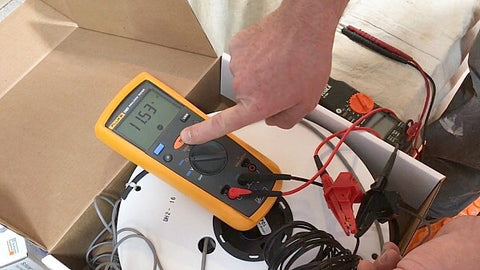
Test 4: DITRA-HEAT Thermostat Floor Temperature Sensor Test
- Test floor temperature sensors using a multimeter to verify accuracy.
- Record values in the heating cable tests log.
Step 5: Installing the DITRA-HEAT Cable
Step 5.1: Pre-Installation Checks
- Ensure heating cables match the power supply and do not exceed the thermostat's 15 amp limit.
- Photograph the installation for future reference.
- Conduct the first set of required tests before removing the heating cable from the spool.
Step 5.2: Cold Lead Thread and Cold/Hot Splice Placement
- Thread the heating cable cold lead through conduit, if required.
- Mark the cold/hot splice location.
- Cut the DITRA-HEAT or DITRA-HEAT-TB matting and insert the splice.
- Temporarily secure the splice to the floor with thin-set mortar or adhesive.
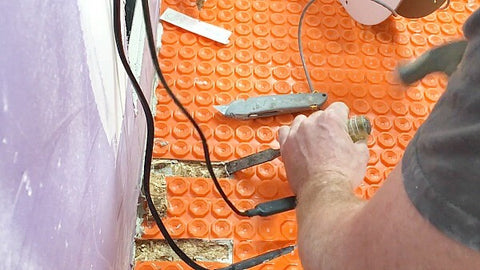
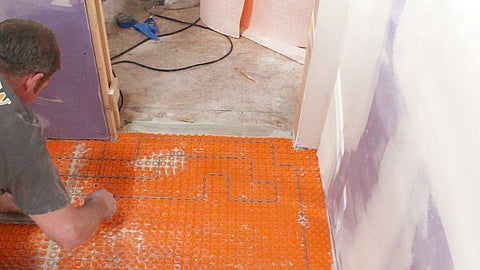
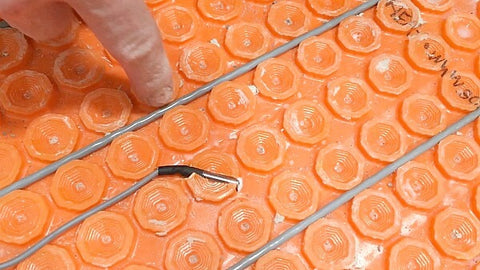
Step 5.3: Cable Embedding
- Embed the heating cables between studs at a 3-stud spacing.
- Use care not to damage the cables during installation.
- The maximum allowable length of a single run is 10 ft; create a "jog" or turn the cable at this point.
Step 5.4: Sensor Installation
- Install thermostat sensors evenly spaced between two cable runs, at least 24" from the wall.
- Mark the sensor location on the DITRA-HEAT and cut the matting to recess the sensor.
- Temporarily remove the heating cable while cutting the matting.
- Temporarily secure the sensor to the floor with thin-set mortar or adhesive.
Step 5.5: Final Retesting
Once the heating cable and floor temperature sensor installation is complete, retest and record values in the heating cable tests log.
Step 6: Heat Cable Warnings: Safety Precautions
General Warnings
- Always follow provided warnings to avoid personal injuries and property damage.
- A dedicated circuit is required for each application.
- A ground fault circuit interrupter (GFCI) is mandatory for each circuit.
- Never install a 120 V cable on a 240/208 V power source.
- Ground the heating cable, mark the circuit breaker, and de-energize all power circuits before installation.
Cable Handling and Installation
- Never cut or modify the heating cable.
- Ensure the cable is entirely installed under the floor covering.
- Follow recommended spacing guidelines to prevent fire hazards and damage to floor coverings.
- Test the heating cable while on the spool and at subsequent steps during installation for warranty purposes.
Additional Cable Warnings
- The heating section of the cable must be entirely installed under the floor covering.
- Do not run the heating cable under a wall, from one room to another.
- Never install the factory splice in the wall; it must be installed entirely under the floor covering.
- Heating cable testing is required while the heating cable is on the spool and at two subsequent steps during installation.

This detailed guide lets you transform your living space into a warm and inviting haven. Please always refer to the official Schluter-DITRA-HEAT installation guide throughout the installation of your new heated floors.
Happy heating!
- FAQ
Ready to Plan Your Next Project? Let’s Talk.
Stop guessing when it comes to your home renovation decisions. If you have questions about products, installation, compatibility, or project planning, our team is here to help. We’ll walk you through the best solutions for your home, so you can move forward with confidence and complete your project the right way.
📞 Phone: 905-660-7600 (Ext. 1)
✉️ Email: sales@gtdsupply.com
